Wednesday, May 30, 2012

DIY: crocheted rag rug part 3


Changing colour by attaching a new piece of sheet yarn couldn't be easier!


Simply line up the edge of the sheet you were crocheting with, with the edge of the new sheet.


Then grab that needle and thread I told you to get (here), and join the two pieces with a quick stitch.

I use a blanket stitch, but you can use whatever stitch you feel most comfortable with.

I don't really knot it much more than just going through with the needle a couple of extra times at the beginning and the end of the stitch. I haven't found that they come apart, and I have put a smaller round through the washing machine a couple of times already.


Finally, continue on crocheting as if the new piece of sheet is part of the old piece. Go around as many times as you like with that colour and change again if you desire.

Next week will be the end of this series when I tell you how I finish up a rug.

If you need a refresher or if you missed them, read part one and two.

Friday, May 25, 2012

friday fixations: peony tulips

If you're a peony lover like I am, plant peony tulips so you can experience the ruffle of a peony well before they actually bloom. These look so much like real peonies that I'm never planting regular tulips again.


Also, if you happen to follow my twitter, you probably would have guessed that our basement flooded last night. Thankfully, we caught it early so the damage is pretty minimal, but our basement is a complete mess and there are four huge fans and a dehumidifier running like jet planes down there. So I'm truthfully more fixated on that today.

These things always happen on a Friday when you've got a million things to do, don't they? (I would have been completely fixated on the tulips today -- as I have been all week -- but they're really more to cheer me up now than anything.)

Wednesday, May 23, 2012

DIY: crocheted rag rug part 2

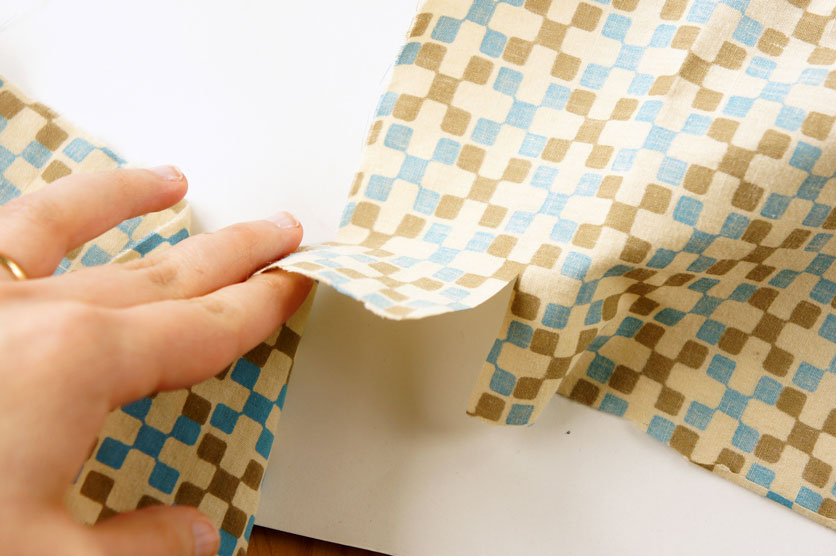
Now the fun part! Or the tricky explaining part if you're me!


Grab one end of the sheet yarn and make a simple slip knot. This is going to be the centre of your rug.


Insert your hook into the loop.


Pick up the long end of the fabric and loop it once over your hook


And pull that loop through the first loop (the slip knot loop)


Pull it through to make a new loop.

I also made a video to help you see the process a little better:


Continue making a chain of loops until you have between 5-7 chains. I'm never really precise with this either and I probably should be. I usually just listen to what the fabric tells me since it tends to naturally want to curve into a circle on its own after a certain amount of loops.


This is kind of the tricky part. You have to find your original loop hole and, with your hook still in the last loop, stick it into the original loop


Loop the long end of fabric over the hook (just as you've been doing all along)


And pull that fabric through the original loop


Then keep pulling it through the loop your hook was already through (or the last loop in your chain) and close the circle.

Here it is in video form to help you see a bit better again:


Now you have to continue around the circle by finding a loop, pushing your hook through


pulling a new loop through that hole


and pulling it through the last loop

Another video helping you to see this a little clearer:


Continue around and around like so.

Some important things to note.

Try to keep the stitches (loops) tight but not too tight. If you make them too tight, the round will start to curve up on itself and you'll end up with a bowl (I've made my fair share of these!). If the stitches (loops) are too loose, then the rug will be too stretchy and you'll end up with gaps. This is something that takes a lot of practice to get perfect, so take your time figuring it out and don't feel discouraged if you have to take apart a whole rug and redo it. That's part of learning.

You'll have to add double stitches (loops) as you go along to help with keeping things comfortably loose (not too loose) and to help the rug lay flat. Double stitching basically means that instead of pulling one loop through a hole, you're going to pull two. So you'll pull your first loop through both loops (so many loops!) and then you'll pull another one through that same loop just as before.

Here's a video to help explain:


I usually don't have to make too many double stitches at the beginning, but as you get larger, you'll be using a lot more double stitches. The larger you go, the more space you'll need to take to make the rug lay flat. This just takes a lot of practice to know when, but generally, if my last loop doesn't match up with the next hole and I feel like I have to stretch it over to get into that spot, I'll make a second stitch (you don't want to pull it tight).

As I said before, if you mess up, don't be discouraged, just pull out the loops and start again. The great thing about this is that no matter how big you get, you can always pull out any mistakes you make and start over. I've had rugs almost finished and I find that all of a sudden, a round is getting a little tight and curving up. So I've pulled out the entire round and started again. It sucks but it's not the end of the world.

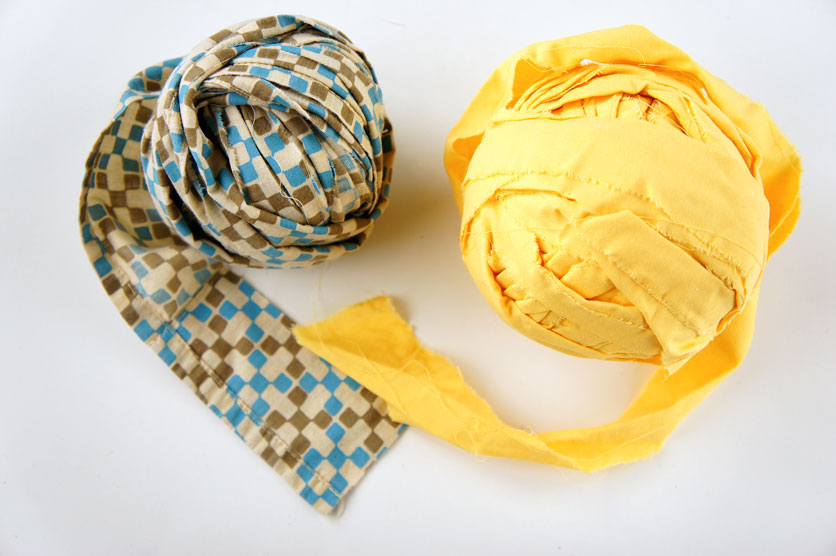
Practice this up and then next week, I'll show you how to switch fabrics!

And if you missed it, here is part one: how to make sheet yarn.

Friday, May 18, 2012

friday fixations


{feathers} Whenever Hermes loses a larger feather, I can't just throw it away. They're so pretty that I keep them around, stuck into plant pots. Last weekend, we repotted all of my inside plants, so all of Hermes' feathers ended up in one pot. I kinda like it. Do any of you with birds do this too?

{tulips} I know I talk a big game about cutting flowers for inside the house, but in reality, I have a really hard time doing it especially when the plant is flowering for the first time. But the other day, I thought, Why should the neighbours get to enjoy looking at my tulips? So I cut a bunch of them and I carry the vase around with me throughout the house. They smell so good and they're so pretty! I absolutely can't wait until more flowers start blooming!


{cauliflower} I used to hate this vegetable, but after having it as a substitute for mashed potatoes, I'm a convert. It's easy to do. Just steam a whole head, cut the core out, mash or puree it, then mix in your usual mash potato mix ins like some butter, mayo, salt and pepper (and some bacon if you've got it), and enjoy. It's so so good (and super filling)!

{silly cats} He wanted in pretty badly, but he had the wrong house. (Please take note of his legs! He just plopped himself down like that.)

{frozen poptarts} I shouldn't be eating these, but they're so good. I find this works especially well with the fruits and s'mores tarts. The s'mores is especially good. Chewy marshmallow is the best!

{pergolas} I'm so sick of walking into every store and seeing another dreadful metal gazebo covered with a dull beige tarp. They all look the same no matter what store you go to. There's really no choice in selection unless you're counting price. Pergolas, on the other hand are so simple. And since they're made from natural wood, they can be painted a bright colour (if you're so inclined) or allowed to weather which makes so much more sense to me than a gazebo. Plus you can ditch the boring beige tarp and buy some speedy growing climbing plants and let them go to town instead.


{light ice cream coloured nail polishes} I made a special trip to get these, I'm that obsessed with them. From left to right: Pointe, Orange Sorbet, Latte, Petal, and Sweet Mignon (aside from the orange, these are all really light barely-there polishes. I'm kind of done with the overworked manicures that are popular these days).


{this guy}

Wednesday, May 16, 2012

DIY: crocheted rag rug part 1


After much thought (and many questions from readers), I've decided to attempt to do a tutorial for how I make my crocheted rag rugs. I was a little hesitant to do one because I think I rely more on feel when I make a rug and not so much on technique, and feelings are really hard to explain when it comes to producing a desired result for someone else. At any rate, I figured I'd try and if there are questions, just feel free to ask. I will say, though, that I am NOT a crocheter. I've never done it except for the rag rugs, so I don't know any technical terms, I only know what Tootsie told me to do and what I've figured out on my own along the way. If you ARE a seasoned crocheter, curse quietly in disgust to yourself. Thanks!

This is part one because I think there's a lot to kind of wrap your head around when first starting. First, you should gather your materials. So your shopping list should include:
  • Getting some thrifted bed sheets. I try to stick with cotton since flannel is too thick and I think silk would give a really odd effect to the stitches (too open). I also think lighter weighted worn-out cotton is best, but generally, it's just whatever colour or pattern catches my eye or what I think would work with other colours I have. You can also get any size you like, it's just going to effect the amount of that particular colour or pattern you have. You can also use any spare cotton fabric you have lying around. It doesn't necessarily have to be a sheet. Finally, I always wash them before doing anything. That's kind of a 'duh' suggestion, isn't it?
  • Next, you'll want to pick up a crochet hook. I thought I lost the one Tootsie gave me and did a lot of searching for a new one, but thankfully I found it. Anything too small or too large just felt so wrong. The size is 1/9-5.50 MM and the brand is Boye U.S.A. In my quest to learn more about crocheting rag rugs, I noticed a lot of people using really big fat crochet hooks. I would assume these people are the crochet experts who've moved from crocheting with yarn to rugs because (as best as I can figure) the size of the hook determines the size of your loop (as you loop over the hook, you pull it to that size), that gives you an even sized loop all the way around. So this is one area that I gauge depending on how the rug is circling. I could get a fatter hook to help with this process, but I'm really unwilling to go against what I was taught. If Tootsie made gorgeous rugs with a small hook, so will I.
  • You'll also want a needle and thread, but I assume most of us have that at home already. Any size needle is fine and any colour thread that blends with all your fabrics will do. I tend to use a cream coloured thread. You shouldn't be able to see much of it anyway since this is how I join different sheet colours together.
  • Scissors, of course!
Now you're ready to rip up your sheets! This is probably the most tedious task and I really don't like it because of the amount of dust that's created. It may sound silly to you, but I always wear a mask when I do this. I have a history of lung problems so I don't want to breathe in sheet dust as well (and you'd be surprised at how much fluff will be on your clothes afterwards so just imagine breathing it in at the same time). Some sheets are worse than others, but I'd rather be safe now than sorry later. I also try to do the ripping in my craft room. It's tempting to do it on the couch while watching tv, but then the couch will be covered in fluff and the room will be dusty. So I just knuckle down and get it done whilst staring at the wall. And I do it when Idle Husband's at work cuz he hates the sound of ripping sheets, and your significant other might hate it, too. It is a really terrible sound, but it's not really that annoying if you're the one doing it!


I usually start on the hemmed end and cut a slit in the sheet all the way down through the thread of the hem. The width of the strip should be around 1 1/2 - 2 inches, but I'm never precise with it. From there, you only have to pull and the sheet should rip straight down.


Once you reach the other end, stop a few inches from the end (I like to leave a lot here so when I'm crocheting, I don't accidentally pull too hard and rip the strip off),


and cut another slit in the fabric about the same width as the first one. Now you can rip the sheet straight up, from the bottom hem to the top.


Keep repeating this back-and-forth process until you get one long strip of fabric. Now you've essentially made yourself sheet yarn. I roll these up into balls so they stay tidy. It's helpful to get rid of any stray strings you find hanging about, too. I didn't do that on some of my first sheets and loose strings can be a real pain to work around.


I like to leave the hems intact and, as I'm crocheting, I pull out the string and open the hem. Then I rip it about half an inch to the end which gives me another 4-6 inches of fabric depending on how wide the hem was. Plus it does double duty as a safety stop on one end as I'm ripping. It's really easy to get overzealous and rip a strip straight off instead of keeping them all together. If you do that, don't worry! It's still usable! I'll talk about joining strips together later.

I hope you get some fabric ripped up cuz next week, I'll show you how to start a circle!

Monday, May 14, 2012

the gem and mineral show

This weekend, we went to the Edmonton gem and mineral show. I thought it would be a good way to get my Drumheller fix without actually having to drive all the way to Drumheller. But it kinda backfired on me cuz now I want to go to Drumheller even more.


We were kind of disappointed at how few Canadian gems and minerals were there. Stones were also really expensive and overly processed.  I had hoped to find a bit of ammolite (an Alberta gemstone), but pieces smaller than my pinky finger were way too expensive for me and besides, I wished they had been polished just a touch to bring out the colour but not so much to make them look fake. I'm not a big fan of stones that are polished, pierced with holes, or grinded into unnatural shapes (like the bin of rock skulls we saw). And a lot of the jewelry had out-dated settings so we didn't get anything except a piece of fossilized coral.

We like things weird.

Thursday, May 10, 2012

DIY: mini notebooks


I've recently noticed that mom's always looking for something to write a list on even though she's got an iPod (which I keep trying to tell her is great for keeping multiple lists). So for mom's day this year, I thought I'd make her a notepad that's small enough to fit into her iPod holder while providing her with an easy place to jot down her little lists (cuz old habits die hard).


Step 1: Decide the size and shape you want your notepad to be and make a template with a stiffer paper. I found this makes cutting the paper a lot easier because you can just paperclip the template onto your individual papers and cut around that instead of trying to measure each piece individually.


Step 2: Cut out a ton of paper! The smaller your notepad, the easier this will be because you'll be able to get a lot of sheets from one piece of paper. The great thing about this is that you can use any paper you can find as long as you're able to write on it. I used a combination of scrap papers I had lying around. Although, full disclosure, I did purchase a small package of graph paper cuz I really wanted to have that type included. Also among my papers is a book page from a children's book, old stationary, kraft paper, some cool space shuttle paper I found in a box I was unpacking once (sometimes, I save the most bizarre things), and an old airmail envelope (I even made sure the envelope pocket was still usable for even littler notes -- if there is such a thing).


Step 3: Organize your papers in the order you'd like them to be (instead of having all the graph paper together, for example, I spaced them apart between other types) and make sure they're all stacked together evenly. Add some stiffer paper as a front and back, then use bull dog clips to hold it all together.


On the top seam of the papers, paint on a layer of white glue (yes; ordinary white glue. I bought some on clearance for a dollar) and let it dry. Continue adding layers of white glue (drying between layers) until you think it's enough. That's really vague, I know, but I think I just kept adding and unclipping to see how the paper was holding up to flipping to determine if I should add another layer of glue. I think between 3-5 layers is probably sufficient.


Step 4: Once dry, your notepad papers should be stuck together at the top allowing you to flip through the book rather easily. I finally added duck tape on the top to cover the seams and to further ensure the papers stay together. I chose it because it's flexible, but you could use any kind of tape you like (but duck tape comes in some fantastic colours and patterns these days!). I left my book fairly plain because I like how it's a party on the inside and all business on the outside, but you can decorate the front and back of the notepad however you like.

You're basically done with the notebook BUT if you want to add a little extra you can:


Cut some slits in the back paper and thread in some elastic.


Pull the elastic tight and stick a pin in to determine whether the elastic is tight enough to hold the book together but loose enough to open the flap. Just play around with it a bit at this point. Once you figure out the size it should be, hold the elastic tight and sew a simple straight stitch across the two ends of the elastic.


Boom! Now you've got an elastic to hold the pages shut.

You could cut the ends off and stop here OR you could:


Use the exact same method to figure out the size for a mini pencil and sew the elastic tails together to make a little pencil holder!

NOW you can go ahead and cut the ends off.


Don't forget to leave a sneaky note inside once you're done!